


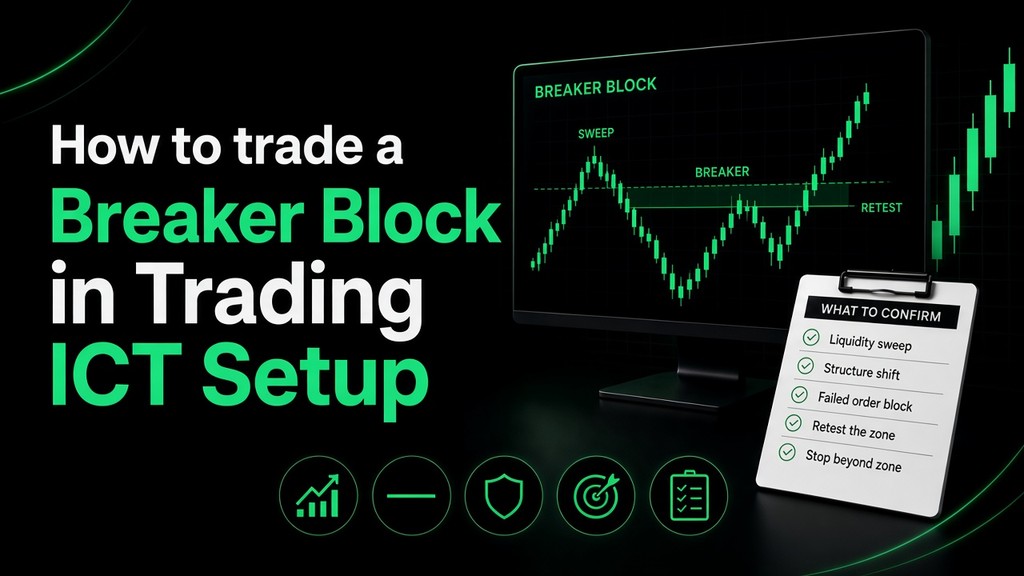
A breaker block in trading is a failed order block that changes jobs. Price closes through a zone that should have held as support or resistance. After that failure, and only after a liquidity sweep plus a real shift in market structure, traders treat the same zone as a level in the opposite direction.
A bullish breaker block is old resistance that failed, then acts as support on the way back. A bearish breaker block is old support that failed, then acts as resistance. The idea is used in ICT (Inner Circle Trader) and Smart Money Concepts. It is a location for a reversal entry. It is a complete trade only when the sweep, the structure break, the retest, and the risk plan all line up.
This guide covers how the zone forms, which candle to mark, how bullish and bearish breakers differ from order blocks, mitigation blocks, and rejection blocks, and how to trade one without blowing a funded account’s daily loss.
What a Breaker Block Actually Is
Start with an order block, because a breaker block cannot exist without one.
An order block is the last opposing candle before a strong impulsive move. In a rally, that is often the last down candle before price drives higher. In a selloff, it is often the last up candle before price drives lower. Traders mark the high and low of that candle, sometimes including the wick, and expect price to react there if it returns while the zone is still intact.
The zone stays an order block only while it holds. The moment price closes through it, the original idea is dead. That dead zone can become a breaker block if two more things happen:
- Price first runs liquidity beyond a prior swing (a sweep of stops above a high or below a low).
- Price then closes beyond the opposite swing, so market structure actually shifts.
Until both of those prints are on the chart, you have a broken level. You do not yet have a breaker block.
Classical charting already knew the behavior. Support that breaks often acts as resistance later. A breaker block is that flip, drawn as the range of the failed order-block candle, with the sweep required before the flip is trusted.
The Sequence That Makes It Valid
Teach yourself one order of events and ignore any zone that skips a step.
Bullish breaker block
- Price prints a swing low, then a swing high. The last down candle before that rally is the bullish order block.
- Price trades back and sweeps below that swing low. Sell stops sitting under the low get hit. This is the liquidity sweep.
- Price reverses and closes above the swing high. That close is the bullish market-structure shift.
- The order block that failed during the sweep is now the bullish breaker. On a later pullback into that candle’s range, traders look for support.
The swing path is low, high, lower low, higher high. The lower low is the sweep. The higher high is the confirmation.
Bearish breaker block
- Price prints a swing high, then a swing low. The last up candle before that drop is the bearish order block.
- Price trades back and sweeps above that swing high. Buy stops above the high get hit.
- Price reverses and closes below the swing low. That close is the bearish market-structure shift.
- The failed order block is now the bearish breaker. On a later rally into that candle’s range, traders look for resistance.
The swing path is high, low, higher high, lower low.
A wick through the swing is a probe. The structure shift that validates the breaker is a candle close beyond the swing on the timeframe where you marked it. A 15-minute wick through a high, with the candle closing back inside, leaves the old structure intact.
How to Mark the Zone
Sloppy boxes are the main reason breaker blocks “fail.” Use one marking rule and keep it.
Preferred rule. Mark the single order-block candle that price closed through:
- Bullish breaker: the last down-close candle before the rally into the swing high that later got swept and reclaimed. Draw the box from that candle’s open to its high, or from its low to its high if you include the wick. Pick one and stay with it.
- Bearish breaker: the last up-close candle before the drop into the swing low. Same choice: body only, or full range including wicks.
Wider rule. Some traders shade every candle between the first swing and the second swing. That box is easier to see and harder to trade, because the retest can tag the top of a tall zone and never reach your entry. Use the wider box only as context. Execute from the order-block candle inside it.
Two filters keep the zone honest:
- The impulse away from the original order block should be obvious. A drift of a few small candles is not an institutional push.
- The break of the order block should be a close through the far side of the candle, not a wick that pokes in and leaves.
If you have to move the box after the retest so that it “touches” price, the setup was never there.
Why the Sweep Matters
The sweep is the part that separates a breaker block from an ordinary break of structure.
Under a swing low sit the stops of buyers and the sell stops of breakout traders. When price runs that low and then reverses, those orders are filled and the market has a reason to turn. The same thing happens above a swing high. ICT traders treat that run as evidence that the opposing side has been cleared before the new direction is trusted.
A structure break with no sweep can still trend. It is a weaker breaker. Price may simply be continuing, and the “failed” order block may get reclaimed. Require the sweep if you are calling the zone a breaker block.
Better sweeps share a few traits:
- They take an obvious pool: equal highs, equal lows, the previous day’s high or low, or the Asian session range.
- They are quick. Price stabs the level and leaves, rather than accepting and trading there for many candles.
- The candle that sweeps shows rejection: a long wick and a close back inside the prior range.
- The structure break follows on the same swing, not ten sessions later on a different story.
Where Breaker Blocks Sit Among the Other Blocks
ICT education groups three ideas that all start from an old zone. They do different jobs.
| Order block | Breaker block | Mitigation block | Rejection block | |
|---|---|---|---|---|
| What it is | Last opposing candle before an impulse that is still respected | That same candle after price has closed through it | An old order block revisited after the original move has already worked | The wick of a candle that rejected a swing extreme |
| Direction | Continuation of the impulse that created it | Opposite of the original order block | Same direction as the original order block | Reversal from the rejection |
| Liquidity sweep | Helpful, optional | Required, before the structure shift | Optional | The wick itself is the sweep |
| Structure shift | The impulse is the shift | A close beyond the opposite swing is required | The original shift already happened | A single rejection can be enough |
| Trade idea | Buy support or sell resistance while the zone holds | Trade the retest after the zone has flipped | Trade the return to unfinished orders in the original direction | Trade the rejection from the wick |
A mitigation block keeps its original polarity. Price left unfilled orders, went to the target, and later returns to the same zone to “mitigate” them. You are still trading with the original move.
A rejection block is built from the wick, not the body. A long lower wick that sweeps a low and closes back up is the bullish reference. There is no requirement that an entire order block has failed and that the opposite swing has broken.
If the zone never broke, it is still an order block. If it broke and structure flipped after a sweep, it is a breaker. Labeling every touched candle as a breaker is how charts fill up with boxes that do not pay.
A Worked Bullish Example
This is a teaching sketch on EURUSD, H1, not a signal.
- Monday’s rally runs from 1.0800 to 1.0860. The last down candle before that rally spans 1.0824 to 1.0836. That is the order block.
- Price falls, stabs 1.0792 (below 1.0800), and closes back above 1.0800. Stops under the low are taken. The order block has been traded through on the way down.
- The next H1 candles close at 1.0868, above 1.0860. Structure has shifted bullish. The candle from 1.0824 to 1.0836 is now the bullish breaker.
- Price pulls back two sessions later and tags 1.0830, inside the box. The H1 candle closes bullish, back above the zone’s midpoint.
Retest entry: buy at 1.0832.
Stop: 1.0818, a few pips under the breaker low. Risk is about 14 pips.
First target: the swept area is already behind you. The next buy-side pool is the 1.0868 high, about 36 pips away, a little over 2.5 times the risk. A further target is the prior daily high if the higher timeframe is also rising.
If the pullback closes an H1 candle below 1.0824, the breaker has failed. The long is over. There is no averaging in.
A Worked Bearish Example
Gold, H1, same logic in reverse.
- A drop runs from 3380 to 3340. The last up candle before the drop spans 3364 to 3372.
- Price rallies, prints 3388 above the old high, and closes back under 3380. Buy-side liquidity is taken.
- Price then closes at 3334, under 3340. The candle from 3364 to 3372 is the bearish breaker.
- A retest tags 3368 and prints a bearish close.
Entry: sell at 3367.
Stop: 3376, above the breaker high. Risk is about 9 points.
Target: 3340 first, then 3334. If 3340 is only a few points under the entry by the time you are filled, the trade does not pay. Skip it. A valid breaker with no room to the next sell-side pool is still a bad trade.
How to Trade the Retest
The professional entry is the retest. Chasing the candle that breaks structure means buying or selling after the move, with the stop on the far side of a zone you are no longer near.
1. Higher-timeframe bias. Read the daily chart first. A bullish breaker on H1 that fights a clear daily downtrend is a countertrend scalp. Trade it smaller, or leave it. A bullish breaker that also sits in daily discount, into a daily breaker or order block, is the version worth full risk.
2. Mark the sweep and the close. Write the prices down. If you cannot point to the swept high or low and the candle that closed beyond the other side, you are not in a breaker.
3. Wait for price to return. The return can be the same session or days later. A zone that is never retested is a zone you do not get to trade. That is fine.
4. Take one confirmation inside the box. Any one of these is enough. Stacking all of them means you will miss the move.
- A rejection wick from inside the zone and a close back out in the trade direction.
- A lower-timeframe market-structure shift inside the box. On an H1 breaker, that can be a 5-minute or 15-minute break of the last pullback swing.
- A small fair-value gap overlapping the breaker, so the retest has two reasons to pause.
5. Enter on the close of the confirmation candle, or with a limit at the edge of the order-block candle if your plan allows resting orders. On MT5, a limit at the breaker edge needs a cancel rule: if an H1 candle closes through the zone, the order comes off.
6. Place the stop beyond the zone, not in the middle of it. Breaker retests are volatile because the sweep just ran stops. A stop inside the candle gets tagged by the same noise that makes the setup work. Add a small buffer for spread. On gold and indices, size that buffer from recent ATR rather than a fixed pip count.
7. Target the next liquidity pool, not a random multiple. For a bullish breaker, that is the swing high that confirmed the shift, then any equal highs or the previous day’s high above it. Take a portion off at the first pool. Leave a runner only if the higher timeframe is aligned and the daily loss limit can still absorb a full stop on the remainder.
Aggressive alternative. Some traders sell or buy the close of the structure-shift candle and use the breaker only as the invalidation. The fill is earlier. The stop is wider relative to the remaining target, and the retest may never come in your favor if you are already in. Treat this as a separate setup with its own results. Do not call it the same trade as the retest.
When the Breaker Is Invalid
Drop the idea as soon as any of these is true.
- There was no sweep. Price broke structure from the middle of the range.
- The “break” was a wick. The candle closed back inside the old swing.
- Price closes back through the breaker in the original direction. A bullish breaker that closes below its low is support that has failed again.
- The zone is in the middle of nowhere, far from higher-timeframe liquidity, during a dead session.
- The distance from your entry to the stop is larger than the distance to the next real target.
- You redrew the box to catch a candle that missed it.
A failed breaker is information. The sweep-and-shift story was wrong, or it was early. Flatten and wait for the next clean sequence.
Timeframes, Sessions, and Pairs
The pattern is the same on every timeframe. The cost of being wrong is not.
| Use | Mark the breaker on | Refine the entry on | Typical hold |
|---|---|---|---|
| Swing | Daily | H4 close or retest | Days |
| Intraday | H1 or H4 | M15 or M5 confirmation | Hours |
| Scalp | M15 | M1 or M5 only for the trigger | Minutes |
M1 breakers against an H1 trend are noise. If you scalp, the M15 or H1 breaker is the zone, and the lower chart only times the click.
London and New York produce cleaner sweeps on EURUSD, GBPUSD, and gold because that is when the stops actually get run. A breaker that completes in the late Asian session on a major pair deserves a smaller size, or a pass, unless Asia is the session that pair actually moves in.
Majors and gold respect these zones more cleanly than thin exotics. If you trade an exotic or a quiet crypto pair, demand the close and the retest, and cut size. Spread alone can eat a tight breaker stop.
Breaker Blocks on a FundedFirm Account
A correct zone can still breach an account if the stop is wider than the daily loss allows. Size from the stop inward.
FundedFirm’s programs are simulated evaluations, and the rules differ by account.
1 Step. Profit target 10%. Maximum daily loss 3% of the higher of day-start balance or equity, fixed for that day. Maximum overall loss 6% of the starting balance. Minimum 3 trading days. Leverage is 1:100 on forex, metals, indices, and energies, and 1:50 on digital currency. News and weekend holding are allowed. There is no maximum number of days to pass.
2 Step. Phase targets are 8% then 5%. Daily loss is 5% on the same day-start method. Overall loss is 10% of the starting balance. The rest of the framework matches the challenge style: three trading days per phase, the higher leverage, news allowed, weekend holding allowed.
Instant Daily. Funded from day one, with no profit target, on accounts from $5,000 to $18,000, valid for 30 days. Leverage is 1:30. The daily loss is a 3% trailing floor. The overall loss is a 4% trailing line. Open floating loss must stay inside 1% of the account size. A stop-loss has to be on the trade within one minute. Each trade must be held at least 60 seconds. Weekend holding is not allowed. Payout approval is listed within 30 minutes on a fixed 70% split, after the published payout conditions.
What that means for a breaker trade:
- On a $10,000 1 Step account, 3% is $300. Risking the whole $300 on one H1 breaker leaves nothing for spread, a second attempt, or a floating dip before the stop. Risk a fraction of the daily loss, such as 0.5% to 1%, so one failed retest is a normal loss.
- Floating loss counts. A wide-stop daily breaker can threaten the daily limit before price ever tags the stop. If the correct stop beyond the zone does not fit the daily loss at a sane lot size, the timeframe is too high for that account. Drop to H1, or skip it.
- Instant Daily is stricter. On a $10,000 Instant Daily account the 1% open-loss cap is $100. A gold breaker whose stop is $150 away is already illegal at the size you need, even when the 3% trail is further away. Put the stop on at entry, and make sure the loss at that stop is inside both the 1% cap and the distance to the trailing floor.
- The 60-second minimum hold on Instant Daily rules out tapping in and scratching the trade a few seconds later because the first candle twitched. Confirmation has to be real enough that you can sit through a minute.
- News is allowed on these accounts. A breaker that completes into a high-impact release can sweep, break structure, and reverse in one spike. You may trade the release. Slippage through the zone still counts as a breach if it carries equity through the loss line. Know the clock before you leave a retest order working.
- Close Instant Daily positions before the weekend. Overnight during the week is allowed. A Friday breaker that needs the weekly close is a 1 Step or 2 Step trade, or it is a pass.
- No single challenge trade may lose more than 40% of that account’s daily loss limit, and trades on the same symbol in the same direction inside three minutes can count as one trade. Splitting one breaker entry into five tickets does not create five small risks.
- Copying the same breaker across accounts, or hedging it with the opposite position on another account, sits on the prohibited list.
Restricted regions: FundedFirm LTD. does not provide services for citizens/residents of the USA, Cuba, Iraq, Myanmar, North Korea, Sudan, Iran, Russia, UAE. The services of FundedFirm LTD. are not intended for distribution to, or use by, any person in any country or jurisdiction where such distribution or use would be contrary to local law or regulation.
Journal every breaker as sweep-plus-shift, then tag the entry as retest or aggressive. After a sample of trades you will see which timeframe and which session actually pays on the pairs you trade. That record is worth more than another box on the chart.
Mistakes That Ruin the Setup
Marking every touched candle. Most candles are not order blocks, and most broken candles are not breakers. You need the sweep and the close beyond structure.
Buying the sweep. The sweep is the trap. The trade is the retest after structure has shifted, in the direction of that shift.
Using a wick as confirmation. If the candle did not close beyond the swing, structure has not shifted.
Stops inside the box. The retest is supposed to trade into the zone. A stop in the middle is a plan to get filled and stopped on the same move.
Countertrend breakers at full size. An H1 bullish breaker under a falling daily 200-period average can work. It does not deserve the same risk as a breaker that agrees with the daily.
No target before entry. If the next liquidity pool is closer than the stop, the math is already a no.
Redrawing after the fact. The order-block candle is chosen when structure shifts, from the candle that failed, not from whichever candle later touches price.
Pre-Trade Checklist
- Daily bias agrees with the breaker, or you have cut size because it does not.
- You can name the swing that was swept.
- A candle has closed beyond the opposite swing.
- The box is the failed order-block candle, drawn before the retest.
- Price has returned to that box and printed one confirmation.
- The stop sits beyond the zone, with room for spread.
- The next liquidity pool pays at least 1.5 times the stop.
- Lot size risks a preset fraction of the account and cannot, by itself, breach the daily loss or Instant Daily’s 1% open-loss cap.
- You know the next high-impact release, and whether this account may hold into the weekend.
Any unchecked line is a pass. The next breaker is already forming.
Frequently Asked Questions
What is a breaker block in trading?
A breaker block in trading is an order block that price has closed through, after a liquidity sweep and a shift in market structure. Traders then use that same candle range in the opposite direction: old support becomes a bearish breaker, and old resistance becomes a bullish breaker.
Does a breaker block need a liquidity sweep?
Yes. The sweep of a prior high or low is what clears the stops. The close beyond the opposite swing is what confirms the new structure. A structure break with no sweep is a weaker signal and is not a completed breaker block.
How is a breaker block different from an order block?
An order block is still intact, and traders use it to continue the move that created it. A breaker block is that zone after it has failed. Traders use it for the reversal, once the sweep and the structure shift are both on the chart.
Where does the stop go?
Beyond the far side of the breaker candle, plus a small buffer for spread. A stop inside the zone sits in the area price is expected to retest.
What is a bullish breaker block?
It forms on the path low, high, lower low, higher high. The lower low sweeps sell-side liquidity. The higher high confirms bullish structure. The failed order-block candle from the first rally becomes support on the retest.
What is a bearish breaker block?
It forms on the path high, low, higher high, lower low. The higher high sweeps buy-side liquidity. The lower low confirms bearish structure. The failed order-block candle from the first drop becomes resistance on the retest.
Can a breaker block be traded on a funded account?
Yes, if the stop distance and lot size fit that account’s daily loss, overall loss, and any open-loss cap. On FundedFirm, check the rules for 1 Step, 2 Step, or Instant Daily before you leave a retest order working. A valid zone that risks more than the daily loss allows is not a valid funded trade.
Final Thoughts
A breaker block in trading is a failed order block with a job change. The sweep shows that stops were run. The close beyond the opposite swing shows that structure agreed. The retest is where the trade is offered, and the stop belongs on the far side of the candle you marked before that retest began.
Treat the sequence as a filter. Most boxes on a chart never complete it. The ones that do still have to pay relative to the stop, agree with the higher timeframe or be sized down, and fit the loss limits of the account you are actually trading. Traders who can point to the swept swing, the confirming close, and the untouched order-block candle are trading a breaker. Everyone else is trading a story.
Educational content only. Trading leveraged markets involves a substantial risk of loss. Nothing here is investment advice or a recommendation to buy or sell any instrument. FundedFirm programs are simulated evaluations, and payouts depend on the rules. Restricted regions: FundedFirm LTD. does not provide services for citizens/residents of the USA, Cuba, Iraq, Myanmar, North Korea, Sudan, Iran, Russia, UAE. The services of FundedFirm LTD. are not intended for distribution to, or use by, any person in any country or jurisdiction where such distribution or use would be contrary to local law or regulation. Confirm current rules and fees on fundedfirm.com before you purchase.